
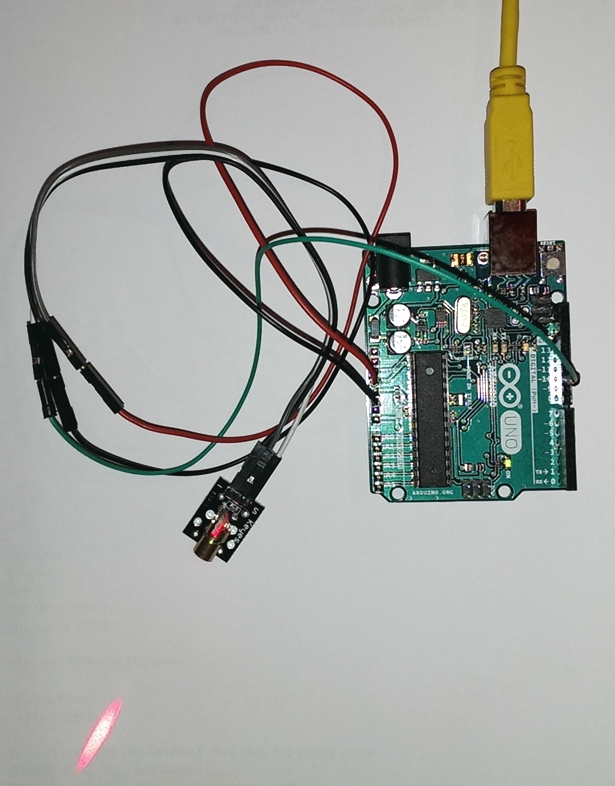
I got the FamilyMall KY-008 laser module a little while back, and have just got around to testing it with the Arduino Uno. Before I get to the technical bits, I want to point out how flimsy the module itself was. I hadn’t even used it, and already the laser component was ready to come off the board. The other complaint I have is the trial-and-error procedure I needed to go through to find out what the pins did. I’ve made a diagram, if it helps others, but I’ve seen elsewhere that the results aren’t consistent.
Here’s the pin setup that worked for me:
 To connect it to the Arduino Uno, you’ll need to find 3 female-to-female connectors, and 3 male-to-male connectors.
You can upload the code below to the Arduino, and you’ll get the laser to flash according to the value set for blinkTimer. Plug the ‘data’ cable into digital 10, as specified in the code.
|
1 2 3 4 5 6 7 8 9 10 11 12 13 14 15 16 |
int blinkTimer = 500; int pinNo = 10; void setup () { pinMode (pinNo, OUTPUT); } void loop () { digitalWrite (pinNo, HIGH); delay (blinkTimer); digitalWrite (pinNo, LOW); delay (blinkTimer); } //middle pin is +, right pin is -, and left pin is data |
Once set up, the laser is surprisingly bright — though not really well focused. It appears to have a good range to it.
Pingback: Article: Arduino and KY 008 laser test - VISUALS+CODE
The middle pin is not power. you do not need to use it.